

Put your body into your strokes full swing. Practice with charcoal and different weight pencils. If you have the dark and light values balanced, you are partly there. What you want to do is make an interesting composition. Let your intuition guide you, have an idea what you are going to do and be ready to alter it as you go. You may need to change the light and dark relationships to make the difference.
You will find that fine lines = lightness; heavy lines = drama and weight; curves = gracefulness; straight = forcefulness; jagged = restlessness; long sweeping lines = movement or growth.
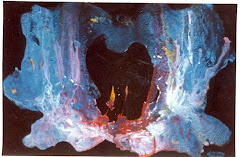
Negative space is the background space that can emphasize the important message. The dark background in the picture of the boat below brings the viewers eye out the door to the focal point.

The eye is brought to the flames in the picture below by the negative space which I marked off.

Heavy lines are strong and stiff, while thin lines alone are weak. Rounded lines with the lines up are happy with graceful movement, while rounded lines facing down are sad, such as droopy shoulders or a sad face.

To find the perimeter of what you want to draw cut a see through frame in a piece of cardboard and look through the hole in order to find your view.
When you are doing a landscape take a photo the scene. Do it yourself, so that the picture will be as you see it and it will zero in on what caught your eye in the first place.
When you are doing a landscape take a photo the scene. Do it yourself, so that the picture will be as you see it and it will zero in on what caught your eye in the first place.

I was painting a scene of San Francisco at ten o’clock in the morning and worked as fast as I could. After a few days, the sun was in a different position that changed the light. Unfortunately I hadn’t taken a picture of the landscape and it was a year before I was able to catch the same light to finish the painting.
Dare to try your ideas and give yourself a good time. Value what you do and act on it before it grows dull.
When you sketch someone you know, study the person and when you start to sketch, do it from memory. Make adjustments entirely on your intuitive feelings.
When I studied advertising fashion illustration we had to go downtown where the dress shops were, study a dress in a store window, and go back to the studio and draw the dress accurately and make it look better than it really was. Sometimes we would put a dress on a hanger and draw the dress with a body in it. This was good training. You can do it too, by memorizing something simple. Then draw it without looking at it until you are finished with the drawing. Don’t expect to hold more than one image in your memory. It is something that not even the most brilliant imager can do.
Make light lines as a guide on the canvas or paper before you start your drawing, so you don’t lose some of the subject by cutting off the top of your picture (maybe someone’s head.) Hold off on detail until the very end. Hold your eye to the design and don’t wander of the edge of the page.
 Would you want this to happen to your masterpiece?
Perspective is an optical illusion, it makes the appearance of three dimensions on a two dimensional surface, but rules don’t make a composition or artistry.
I have previously touched on the study of perspective to get you started drawing right away. In time I will recommend more detailed study of perspective.
Don’t worry about following a rigid path. Let your drawing unfold -- just let it happen. See that there is balance to your drawing.
A quote from Edward Manet, “Paint is what you see at first go. Everything else is padding.” This pertains to drawing as well as painting.
Good draftsmanship is necessary towards the use of any medium.
I hope you realize that I am giving you simple basics of drawing to get your juices flowing. You may want to take your art further. In a coming lesson I will direct you to where you can expand your knowledge of drawing.


No comments:
Post a Comment